In Talenta, there is a Report Builder feature that helps management create reports according to their specific needs. These reports are generated based on raw data provided by Talenta.
There is also access to send Report Builder emails directly to your email inbox. This access can be done by users with the Super Admin/Admin Default role and Custom roles with access to certain data. With this feature, you can download and receive Report Builder emails regularly based on a schedule you can customize.
You can easily arrange which data to display in the table and also filter it directly, then download it in .xlsx or .csv format. Before studying this guide, take a brief look at the basic report builder here.
Important
Make sure your company status is Active on Talenta to use the Scheduled Email Report Builder feature.
Here is the guide on how to create a Report Builder:
Important
You can also go directly to https://hr.talenta.co/report-builder/index.
On the Talenta Dashboard, click “Insight” in the Applications column.
Then click “Report builder” located at the bottom.
And click “Create report” to start composing the report.
-
You will be directed to the Create Report page as follows. You can fill in the basic report info section first.
Explanation:No. Column name Description 1 Name Enter the report name here.
Make sure the report name is unique and not duplicated.
2 Description Enter the report description here.
A. Creating a Report Builder with the Latest Update Report Type
You can create a report builder with the latest update type or a report with the most up-to-date data type. Here are the steps.
In the Select type section, choose Latest update report.
-
Then the information you can include will appear as follows.
No. Column/button name Description 1 Category fields Select the category of fields based on:
a. Personal: Contains choices of employee personal information fields such as:
- Full Name
- Birthdate
- Gender
- Marital Status
- Religion
- etc.
b. Payroll Information: Contains choices of employee payroll information fields such as:
- Salary Type
- Payment Schedule
- Bank Name
- Bank Account Number
- Bank Account Holder
- etc.
c. Employment: Contains choices of employee employment information fields such as:
- Job Position
- Job Level
- Employment Status
- Resign Date
- Resign Reason
- etc.
d. Custom Field: Contains choices of custom employee information fields.
e. Education: Contains choices of employee education information fields, such as:
- Grade (formal)
- Institution Name (formal)
- Majors (formal)
- Start Year (formal)
- End Year (formal)
- etc.
2 Checkbox fields You can check each field one by one based on the category you selected earlier. Decide which fields you want to display in the report. 3 Search bar fields You can use the search bar to find fields. 4 Select all Select this to check all fields. 5 Drag up/down button Click this icon to move the selected fields up or down. 6 Add filter to the field selected Click this to select filters to display.
You can select up to 3 filters per report.
7 Clear all Click this to clear all selected fields. Then, set the filters you want to configure in your report by clicking “Add filter to the field selected”.
-
You will then see a pop-up as follows.
Explanation:No. Column/button name Description 1 Filter type Choose the filter type based on (max. 3 filters). The available filter types correspond to the category fields you selected in the Select info you want to see in reports section.
See the full list of available fields here.
2 Select option If you have chosen a filter type, select the available filter options here. If no filter type is selected, this option will not be available. 3 Delete Click to delete the filter option. If no filter type is selected, this option will not be available. 4 Add filter Click to add a filter. Choose the file format you want to download.
You can also schedule the report builder delivery via email by selecting “Daily” in the Select your report schedule section.
And click "Save as template" to save.
-
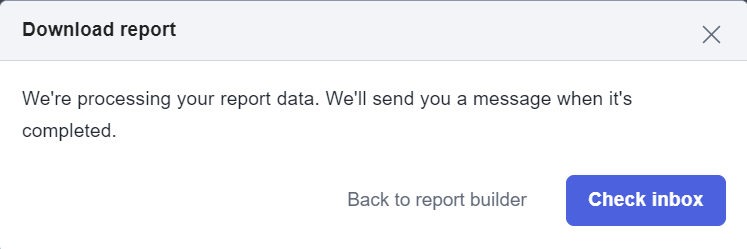
The following pop-up will appear. You can review the table that will be created by the Report Builder. Then, click “Confirm & download” to approve and download the report immediately or “Confirm” to approve the report builder template and save it in the report builder list.
If you choose “Confirm & download”, you can choose to return to the main report builder page by clicking Back to report builder or go directly to the inbox to download the report by clicking “Check inbox”.
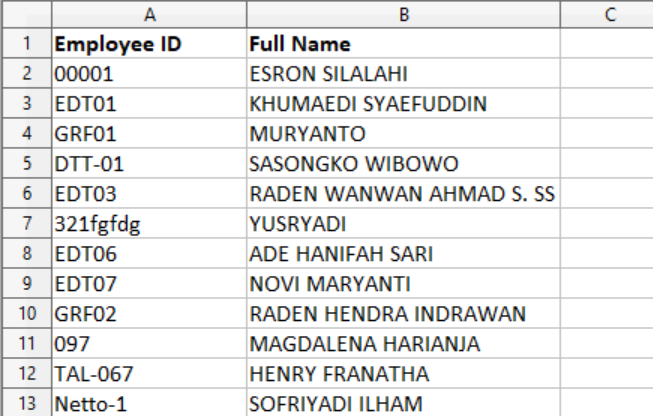
Then, select the inbox labeled “Download Report Builder” and click Download File. Here is an example of the downloaded file display.


B. Creating a Report Builder with the Daily Report Type
You can create a report builder with the daily update type or a report with daily data type. Here are the steps.
In the Select type section, choose Daily report.
-
Then the information you can include will appear as follows.
Explanation:
No. Column/button name Description 1 Category fields Select the category of fields based on:
a. Personal: Contains choices of employee personal information fields such as:
- Full Name
- Birthdate
- Gender
- Marital Status
- Religion
- etc.
b. Attendance: Contains choices of employee attendance information fields. This option is only available for reports in the last 6 (six) months, such as:
- Date
- Total present (day)
- Total absence (day)
- Not clock in (day)
- Schedule working hour
- Actual working hour
- etc.
c. Payroll Information: Contains choices of employee payroll information fields, such as:
- Salary Type
- Payment Schedule
- Bank Name
- Bank Account Number
- Bank Account Holder
- etc.
d. Employment: Contains choices of employee employment information fields, such as:
- Job Position
- Job Level
- Employment Status
- Resign Date
- Resign Reason
- etc.
e. Custom Field: Contains choices of custom employee information fields.
f. Time Off Request: Contains choices of employee leave request information fields, such as:
- Policy Code
- Policy Name
- Time Off Start Date
- Time Off End Date
- Time Off Status
- etc.
g. Reimbursement Request: Contains choices of employee reimbursement request information fields, such as:
- Reimbursement Policy Name
- Reimbursement Effective Date
- Reimbursement Notes
- Reimbursement Status
- Total Reimbursement Request Amount
- etc.
There are new fields available in this category, namely Total Reimbursement Request Amount and Total Reimbursement Paid Amount.
h. Overtime Request: Contains choices of employee overtime request information fields, such as:
- Overtime Request Date
- Overtime Compensation Type
- Overtime Request Status
- Overtime Notes
- Approved Overtime Duration (minutes)
- etc.
Specifically for the Request category fields (Time Off/Reimbursement/or Overtime Request), you can only select one.
2 Checkbox fields You can check each field one by one based on the category you selected earlier. Decide which fields you want to display in the report. 3 Search bar fields You can use the search bar to find fields. 4 Drag up/down button Click this icon to move the selected fields up or down. 5 Add filter to the field selected Click this to select filters to display.
You can select up to 3 filters per report.
6 Clear all Click this to clear all selected fields. Then, set the filters you want to configure in your report by clicking “Add filter to the field selected”.
-
You will then see a pop-up as follows.
Explanation:No. Column/button name Description 1 Filter type Choose the filter type based on (max. 3 filters). The available filter types correspond to the category fields you selected in the Select info you want to see in reports section.
See the full list of available fields here.
2 Select option If you have chosen a filter type, select the available filter options here. If no filter type is selected, this option will not be available. 3 Delete Click to delete the filter option. If no filter type is selected, this option will not be available. 4 Add filter Click to add a filter. Choose the file format you want to download. Then, click “Save as template”.
-
The following pop-up will appear. You can review the table that will be created by the Report Builder. Then, click “Confirm & download” to approve and download the report immediately or “Confirm” to approve the report builder template and save it in the report builder list.
If you choose “Confirm & download”, you can choose to return to the main report builder page by clicking Back to report builder or go directly to the inbox to download the report by clicking “Check inbox”.
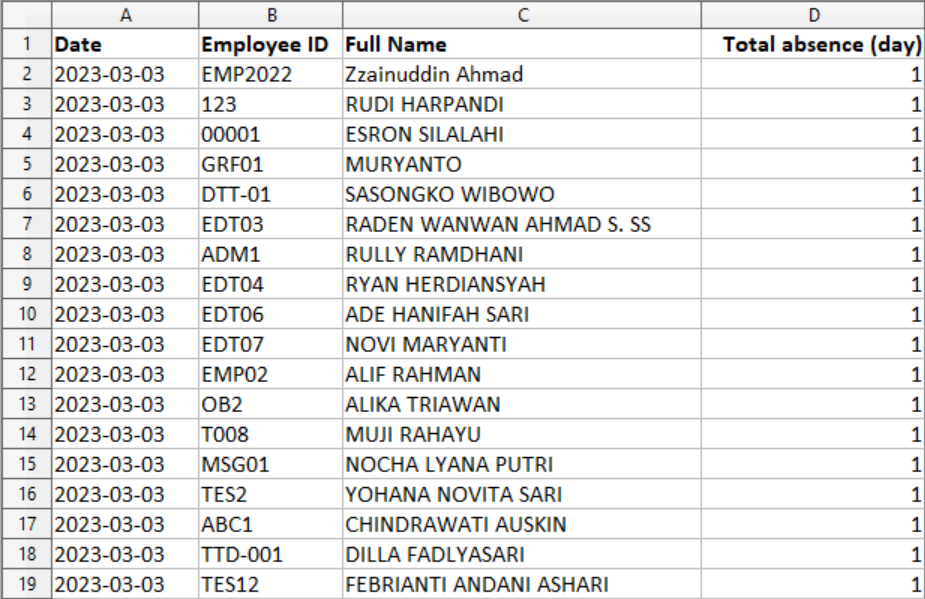
Then, select the inbox labeled “Download Report Builder” and click Download File.

Here is an example of the downloaded file display.
C. Creating a Report Builder with the Monthly Report Type
You can create a report builder with the monthly update type or a report with a monthly data type. Here are the steps.
In the Select type section, choose Monthly report.
Then the information you can include will appear as follows.
-
Explanation:
No. Column/button name Description 1 Category fields
Select the Category field based on:
a. Personal: Contains choices of employee personal information fields such as:
- Full Name
- Birthdate
- Gender
- Marital Status
- Religion
-
etc.
b. Payroll Information: Contains choices of employee payroll information fields such as:
- Salary Type
- Payment Schedule
- Bank Name
- Bank Account Number
- Bank Account Holder
- etc.
c. Employment: Contains choices of employee employment information fields such as:
- Job Position
- Job Level
- Employment Status
- Resign Date
- Resign Reason
-
etc.
d. Payroll Transaction: Contains choices of employee payroll transaction information fields such as:
- Basic Salary (Payroll Transaction)
- Take Home Pay
- BPJS Kesehatan employee (allowance)
- JHT employee (allowance)
- JP employee (allowance)
-
etc.
c. Custom Field: Contains choices of custom employee information fields.
d. Tax Detail: Contains choices of employee tax detail information fields such as:
- Total Allowance
- Total Deduction
- Total DPLK Company
- JHT Employee Yearly
- JP Employee Yearly
-
etc..
e. Monthly Attendance: Contains employee attendance information such as:
- Total Present (shift)
- Total Late In (shift)
- Total Absence (shift)
- Total No Check In (Shift)
- Total No Check Out (Shift)
- etc.
You can combine Monthly Attendance with payroll transaction or tax detail. However, there is a difference in calculation method because the data presented is for one month (1-31), so it does not yet follow attendance cut-off or payroll cut-off.
2 Checkbox fields You can check each field one by one based on the category you selected earlier. Decide which fields you want to display in the report. 3 Search bar fields You can use the search bar to find fields. 4 Select all Select this to check all fields. 5 Drag up/down button Click this icon to move the selected fields up or down. 6 Add filter to the field selected Click this to select filters to display.
You can select up to 3 filters per report.
7 Clear all Click this to clear all selected fields. Then, set the filters you want to configure in your report by clicking “Add filter to the field selected”.
-
And this pop-up will appear.
Explanation:No. Column/button name Description 1 Filter type Choose the filter type based on (max. 3 filters). The available filter types correspond to the category fields you selected in the Select info you want to see in reports section.
See the full list of available fields here.
2 Select option If you have chosen a filter type, select the available filter options here. If no filter type is selected, this option will not be available. 3 Delete Click to delete the filter option. If no filter type is selected, this option will not be available. 4 Add filter Click to add a filter. Choose the file format you want to download. Then, click “Save as template”.
-
The following pop-up will appear. You can review the table that will be created by the report builder. Then, click “Confirm & download” to approve and download the report immediately or “Confirm” to approve the report builder template and save it in the report builder list.
If you choose “Confirm & download”, you can choose to return to the main report builder page by clicking Back to report builder or go directly to the inbox to download the report by clicking “Check inbox”.
Then, select the inbox labeled “Download Report Builder” and click Download File. Here is an example of the downloaded file display.

That concludes the guide on how to create a Basic report builder. Next, you can learn how to request a custom dashboard in Talenta Insight, here.